Connect with us

Life Hacks

12 Awesome Benefits of Glycerin for Lips (3 DIY Recipes Included)

Published

on

12 Awesome Benefits of Glycerin for Lips

Hello, all the beautiful ladies! From today, you won’t focus much on those costly, media-promoted, harmful lip balms. Instead, you can start using easily-available, simple, colorless liquid. Yes, you’ve got it right! We are talking about glycerin for lips!

This sweet liquid is packed with amazing moisturizing and nourishment properties, and that’s why it is a very common ingredient of a lot of alluring cosmetic products.

Why your lips get dried?

Lack of moisture is one of the most common factors responsible for the dryness of the skin. Unlike the skin of other parts of your body, your lips are very soft, sensitive, and are always exposed to harmful UV rays, cold, and draught of air.

Apart from these environmental factors, some health conditions can also make your lips dried. In addition, certain medications, prolonged dehydration, skin allergies, and smoking, etc. can also play their roles in drying your lips.

People who never use any lip balm, and moisturize the lips continuously with saliva, are more prone to lip dryness.

Also Read: Health benefits of Ragi

Benefits of glycerin for lips

Glycerin is known for its humectant nature, among many other qualities, and that’s why it is very commonly used in the food, cosmetic and pharmaceutical industries. Apart from moisturizing your lips, glycerin can heal the inflammation. Below are some of the fascinating benefits of using glycerin for lips.

1. Removes dead skin

Your lips are always exposed to a lot of external aggravation. And you should not be surprised if they become dark and dry. And it would help if you always avoided excessive dryness and peeling of the lips. Applying glycerin on your lips can bring that rosy and pinkish appearance back.

Use a cotton ball to gently dab a bit of glycerin on your lips every night before sleeping.

2. Moisturize your lips

Who doesn’t want to have soft, rosy lips? Soft lips like rose petals also enhance your overall personality. And without moisture, your skin may look unhealthy and may even start bleeding.

Using glycerin for lips can moisturize your skin only in a few days and make them fresh, clean, and supple.

3. Improves mouth ulcers and sores

Mouth sores are usually harmless (unless they are chronic). However, they can make your life uncomfortable as you may feel a burning sensation, especially while eating.

Ulcers and sores commonly affect areas like cheeks, lips, and tongue. And they can take as many as two weeks to disappear! And if there is inflammation, things can get worse for you.

See also  31 DIY Felt Christmas Ornaments

Glycerin can be that miraculous ingredient that can help you eliminate ulcers and sores within a few days.

4. Helps you remove dark spots from your lips

Prolonged and continuous exposure to sunlight, allergic reactions, smoking, high caffeine intake, repeated lips licking, vitamin B deficiency, etc. can cause dark spots on your lips.

Using glycerin for lips can help you get rid of all types of dark spots and blemishes.

5. Improves lips irritation

Excessive dryness is usually responsible for chapped lips, and if not cured on time, can cause inflammation and irritation on your lips.

Different types of allergic reactions and health conditions can also cause chapped lips. In case of an allergic reaction, glycerin may soothe your lips, but can’t control it. Hence, you should consult a doctor for proper treatment. Otherwise, glycerin can be effective in all other types of lips irritation.

6. Glycerin treats bleeding lips

You don’t need to lick your peeled lips anymore, whether they are dry or chapped. Your saliva may heal the pain for a few minutes, but overall, it increases the dryness further and may cause excessive bleeding.

Glycerin for lips cleans and your lips and exfoliates dead skin. And the moisturizing power of this versatile liquid will also enhance healing and stop bleeding.

7. Makes your lips clean and soft

Thanks to the combination of humectant, healing, and exfoliating properties, glycerin can also improve your lips’ color and can make it soft and supple.

8. Glycerin helps get rid of dark lips

Having dark spots on the lips and having dark lips both are slightly different. When you are not so serious about your lips, they get dark due to several factors, including dry air, impurities in the environment, smoking, alcohol abuse, several health conditions, etc.

Your lips may get dark, especially if they are sensitive to cold weather or specific allergens. Irrespective of the causative factors, if you use glycerin for lips regularly, it won’t take long to get back those supple, soft, and clear lips.

9. Glycerin postpones aging signs

As your age advances, the production of collagen starts hampering, and skin loses its elasticity. As a result, fine lines and wrinkles start appearing on the skin.

See also  Best Valentine's day gift ideas for boyfriend

And when it comes to your lips, the outer layer is very thin as well as sensitive. And it becomes progressively thinner with your age. Like, you use various oils and creams for your face, lips also require external care to be healthy.

Glycerin for lips will help you protect your lips from external factors, postpone aging signs, and keep them healthy even at your 50s.

10. Maintains natural pinkish color

Unlike your skin, there is no melanin for your lips. As you know, melanin protects your skin from various external harmful factors and maintains your skin’s natural color.

But your lips are covered by stratum corneum, exceptionally thin skin, which maintains the reddish or pinkish color due to the high concentration of blood vessels. Factors like unhealthy eating habits, smoking, alcohol abuse, cold weather, and high altitude, etc. form a dark layer on your lips.

As mentioned earlier, using glycerin for lips can exfoliate your skin; it can also maintain your lips’ natural pinkish color. 

11. Makes your lips healthy

You may think that glycerin only moisturizes your skin. But, no, this versatile liquid is much more than that. Thanks to its exceptional healing and hydrating properties, glycerin can provide a much-needed protective layer to your lips.

Apart from protection, glycerin can also help due to its cell-regenerating, cleansing, and toning properties.

12. Glycerin for dry and chapped lips

Exposure to prolonged dry weather can make your skin excessively dry. And you will find it hard to avoid licking your chapped lips.

As already discussed, thanks to the moisturizing abilities, glycerin for lips will improve dry and chapped lips within a few days.

Glycerin is no less than sunscreen for your lips. It is packed with various skin and lips benefits and can also improve various other skin problems, including aging, minor burns, acne, injuries, etc.

How to Use Glycerin for Lips? (3 DIY Tips)

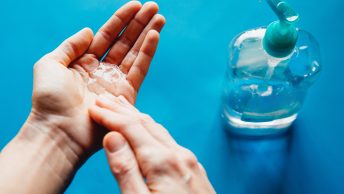
Buying the glycerin from a nearby drug store, cleaning your lips, and applying it with your fingers is a very simple, yet effective way of using glycerin for lips. However, here are some DIY tips if you want to make it more effective.

1. Glycerin and Lemon for Lips

Lemon is very famous for its bleaching prowess. And you can use glycerin and lemon together to get clear and soft lips but the glowing face as well.

  • Mix one tbsp glycerin with one tbsp fresh lemon juice.
  • Alternatively, add one tbsp rose water or distilled water.
  • Apply gently on your lips every day and notice the results.
See also  32 Productive Things to Do When Bored

2. Glycerin and Castor Oil for Lips

Using castor oil with glycerin for lips is another great idea. You might not like the smell of castor oil, but its healing and moisturizing properties can’t be ignored easily.

If you have excessively dry or dark lips,

  • Add ½ tbsp castor oil to ½ tbsp glycerin.
  • For even better results, you can add ½ tbsp. Lemon as well.
  • Apply on the lips before going to bed to give glycerin more working hours.

3. Glycerin and Honey for Dark Lips

Honey is packed with various skin benefits. And you should try this recipe, especially if you have dark lips due to skin allergy or a prolonged ailment.

  • Mix ½ tbsp each of glycerin, raw manuka honey, and lemon juice.
  • Apply swiftly on your lips.
  • Use a cotton ball of your lips are chapped badly.
  • Avoid licking this natural and tasty mixture. 😉
Important tips while using glycerin for lips

It would help if you avoided consumption while using glycerin for lips. Consuming a little amount of glycerin is safe, but excess consumption may be associated with side-effects. Also, if you are allergic to glycerin, you should not use it. Here are some important tips to keep in mind while applying glycerin on the lips.

  • Initially, try glycerin alone to check if you get the desired result.
  • Don’t peel of lick your lips at all.
  • Keep your lips and skin hydrated by drinking enough water.
  • Avoid alcohol, smoking, drugs, and other irritants to keep your lips and skin healthy.
  • You can apply a thin layer of glycerin before applying lipstick to protect your lips from harmful chemicals.
  • Glycerin can only improve minor cuts or burns. Please don’t depend on it in case of a major injury.
To Sum it Up

Glycerin is a versatile liquid, and using glycerin for lips is packed with numerous benefits. It can be a great natural treatment for your lips and can protect from various common problems. Start using glycerin today, if you haven’t used it yet. Do write to us if you know some other benefits of glycerin too.

Reference

https://www.dailygreenlife.com/12-awesome-benefits-of-glycerin-for-lips-3-diy-recipes-included/

Life Hacks

The Best Printable Budget Planners

Published

on

By

Printable Budget Planner

A great budget planner lets you determine how effectively to invest your resources while minimizing or reducing debt. And we support the 50/30/20 method, which indicates that 50% of the money goes to wants, 30% to expenses, and 20% to investments and debt reduction.

Using the cheat sheet, you can quickly achieve this goal. What’s more relevant than time management? Right. Managing funds. It’s no wonder that budgeting is one of the ideas on personal finance management.

So, you don’t have to be a banking expert because it’s not only businesspeople who care about profits and expenses. And you are no different. That’s why it’s a good move to find out some printable budget planners to track your expenses.

Understand the Importance of Money Management:

Before we move ahead, talking more about the printable budget planner, you should first know about the importance of managing cash resources. Managing your cash resources and monitoring your revenue and cost is of vital importance. Throughout the business environment, it’s convenient to waste a couple of bucks here and there and quickly figure out you’ve surpassed your regular, weekly, or monthly target.

You don’t want the credit card’s negative balance? Therefore, maintaining track of your investments will play a significant role in increasing your savings account balance and saving funds for your ideal holiday, home, or vehicle. And a printable budget planner can help you out on this.

Why Do You Need a Budget?

Whichever reason you want money for, it’s crucial to adhere to your day-out budget. A budget is a standardized collection of the planned revenue and expenditures. It’s to help you prepare how, when, and how much money can be invested or earned over some time. A significant benefit in budgeting is the opportunity to monitor and change your spending patterns over time. When it comes to resources that will help you do this, there are lots to pick from.

Remember: A budget’s aim is not to restrict the stuff you will do in your life, but to make sure you can do more things as you appreciate your money situation.

What to Look for in a Printable Budget Planner?

So, you are determined to get a list of the printable budget planner? But did you ever think what you would do if you don’t have any idea about the items a budget planner may include? If not yet. Then you are right to move ahead. Consider the below factors before you embark upon this journey.

See also  32 Productive Things to Do When Bored

1. Check if the planner has accurate spending categories:

Although budget worksheets may help direct your schedule, they cannot fit seamlessly with your spending patterns. While designing your budget, concentrate on expenditure divisions that represent where your money goes. Tracking your expenses with budgeting software is an excellent way to grasp monthly expenditures. For that, we recommend you use a printable budget planner.

2. The more spending categories, the better:

Besides having accurate expenditure classifications, your budget also needs the right number of spending categories. Although you don’t want to go crazy, breaking larger expenditure divisions into smaller parts will give you a better view as to where your money goes. That helps know the spending habits, so it can help find places where you can slash expenses. Just make sure the specifics don’t sink.

3. Income Projections:

Spending is half the budget; revenue is the other. Accuracy is a must, not just for investments, but also for income. You have to account for how much money you’ll spend, not how much you make or think you’ll make.

4. Irregular expenses categories:

It’s easy to get caught in the monthly mentality when making a schedule, so don’t neglect to add individual costs that may only arise once a fifth, twice a year, or once a year. You may, for example, pay your auto insurance every six months, while your homeowner’s association dues are due monthly. To ensure correct accounting for these costs, annualize the sum, then divide by 12. Construct the balance into your monthly budget and set aside money in a different account so you can cover those costs as necessary.

5. Item for savings:

It wouldn’t be a program without cash. Your budget will view savings as an expenditure, not just the “leftover” or excess liquid if any. In seeing savings as investments, you ensure you spend capital whenever it is most important. Of starters, you may provide a general savings line item, as well as a segment for your emergency fund or investments for a home down payment.

6. Tracking cash purchases:

You don’t have to chart every penny dollar you use. However, seek to plan for cash expenditure correctly. Cash expenditure can quickly become the most budget leaks. Cash falls quickly, so if you don’t note down anything you invest in, you’ll glance at your expenses and where your money went.

7. Written goals:

This is a major one, not part of most professional budgets. Although written financial targets are not a necessary budget component and are not used in most budget worksheets, they are an incredibly essential element in financial planning.

See also  How To Steam Your Face

Through establishing reasonable objectives such as saving for a mortgage, purchasing a new vehicle, staying out of debt, planning for retirement, sending your children to college or just making a travel budget, you will start discovering opportunities to prepare for those targets and monitoring how close you are to achieving them.

The List of Some Printable Budget Planners:

Your wait is over check below for some of the best printable budget planners.And get your budgeting done. It’s easy, peasy.

1. Printable Crush Budget Planner:

This is one of the most popular printable budget planners that you would love to have. This monthly budget tracker is more stratified than any other printable budget planners, so if you just want to dig through the costs that go out the door, this is a decent budget planning tool for you.

2. Printable Crush Budget Sheet:

We are very serious about its proper use in budget planning. This monthly printable budget planner will amaze you with its simplicity and easy to use concept. In fact, this kind of printable planner would go great with something like a bullet journal.

 3. Family Binder Budgeting Printables:

Budgeting ensures you have a good awareness of your revenue, expenditures, and investment target. That’s why it is excellent for monitoring spending. You won’t get lost as all boxes are usually divided into such a printable budget planner, enabling you to move through each group quickly.

4.  Home Finance Printables:

Many printable budget plans always move past the job order, and that’s the case for this home finance printables kit. You will monitor your total spending, bank statement, loans, monthly schedules, and bill payment reports. It’s just a full financial monitoring device.

5. Thirty Handmade Days Monthly Budget:

When it comes to free budget printables, we have no trouble using a large text. You don’t have to squint to see your income. All that believe the same way would enjoy Thirty Hand Designed Days’ monthly budget planner.

6. Finance Organizing Printables:

Simply Unscripted’s printable budget models are simple and clear when showing what you need to live on a schedule. The package comes with a monthly budget planner, spending & sales trackers and bill by date worksheet, what else do you need?

Tips and Tricks of Budgeting:

It’s pleasant to budget on paper; the hard bit sticks to it. That requires good discipline or descent technique. For the first, we can’t support you, but Martin has a smooth but useful tool to help you manage your expenses. It’s piggy banking.

See also  How to Organize Clothes to Maximize Your Space

What’s the piggy bank technique?

See, just knowing about the best Printable budget planner is not enough. You must know the tips and tricks for better budgeting. So, follow these steps to get the most out of the piggy bank technique.

Step 1. Select main spending categories:

The goal is to balance your books, so you don’t spend more than you earn. You will have to figure out how much you can invest in different aspects of your life. You will use the Budget Manager section, “Part C – Monthly Target Expenditure.” When that’s finished, you ought to check and see the big groups. This may be vacations, saving engagement, Christmas, shoes, birthdays, hobbies, or whatever you pay. If you’re self-employed, do have a tax account—up to four or five.

Step 2.  Did you set up several bills’ accounts?

Already, you know how much money you want to invest in various things, the aim is to keep it as straightforward as possible to decide how much cash you have. To do so, set up a variety of separate bank accounts, each with money in it for a reason, and the money is simply in little pots (almost like placing them in various piggy banks).

Many people prefer to have a big bank account and different bills account. And pick the three or four most prominent expense groups above for the others.

Step 3. Using a standing order:

Now is the time to feed each piggy bank from your main account, even the bills account, which you will still overestimate slightly. Set up standing orders to shift the right cash amount each month. And boom! You are done. 

Do You Overspend?

Spending more than you receive may not sound like a huge deal, but it’s a real catastrophe, not just financially. At best, you’re eroding your savings; at worst, leveraging is required. This saving is probably the worst because it ensures you can’t finance the lifestyle, and there’s no financial preparation with no end in sight.

Sadly, I’ve seen this outcome so many times in a debt crisis, and it doesn’t only affect your pocket: it can damage your house, work, mental wellbeing, and relationships. Therefore, a printable budget planner is always better and you should keep the same handy.

Take Away:

In the end, all good budgeters handle their budgets correctly. While viewing the budget as restricting can be enticing, it’s a way to maintain leverage of your finances, and you can dictate your paycheck what to buy instead of the other way around. Budgeting can be challenging, sometimes frustrating. However, financial performance demands it.

Continue Reading

Life Hacks

8 Active Listening Techniques to Improve Communication

Published

on

By

Effective communication is the foundation of any successful relationship, whether personal or professional. While speaking clearly and expressing yourself well is important, equally vital is the ability to listen actively. Active listening is more than just hearing the words someone says—it involves fully engaging with the speaker, understanding their message, and responding thoughtfully.

Mastering active listening can enhance your relationships, reduce misunderstandings, and foster a deeper connection with others. In this blog, we’ll explore eight active listening techniques that can help you improve your communication skills and become a more attentive and empathetic listener.


1. Give Your Full Attention

The first step to active listening is eliminating distractions and giving the speaker your full attention. This means putting away your phone, turning off the TV, and focusing entirely on the person speaking. When you’re engaged and attentive, the speaker feels valued and understood.

  • Tip: Make eye contact with the speaker, nod occasionally, and use your body language to show that you’re engaged. Put aside any thoughts about what you’re going to say next and truly listen.

Example: If your partner is telling you about their day, put down your phone and focus on their words and emotions. This will show that you care and are present in the moment.


2. Show That You’re Listening

Non-verbal cues like nodding, leaning forward, and maintaining eye contact communicate that you’re paying attention and actively listening. These small gestures help reinforce that you’re engaged and interested in what the speaker is saying.

  • Tip: Use affirming words such as “I see,” “That makes sense,” or “Go on” to show that you’re listening. Your body language should mirror your attention and make the speaker feel heard.
See also  How To Steam Your Face

Example: When someone shares a difficult experience with you, nod in understanding or make gentle comments that convey empathy, such as, “That sounds really tough. Tell me more about it.”


3. Avoid Interrupting

It can be tempting to jump in with your own thoughts or solutions, especially if you’re eager to offer advice. However, interrupting can make the speaker feel dismissed and hinder effective communication. Allow the speaker to finish their point before responding.

  • Tip: Practice patience and resist the urge to interject. If you have something to say, make a mental note and wait for the speaker to pause before you contribute.

Example: If a colleague is explaining a problem, avoid finishing their sentences or offering solutions before they’re done speaking. Wait until they’ve finished before you respond.


4. Ask Open-Ended Questions

Active listening involves understanding the speaker’s message in-depth. One way to encourage further conversation and gain clarity is by asking open-ended questions. These types of questions can’t be answered with a simple “yes” or “no,” and they invite the speaker to elaborate on their thoughts and feelings.

  • Tip: Ask questions that begin with “How,” “What,” or “Tell me more about…” These questions encourage deeper conversation and show that you’re interested in understanding more.

Example: Instead of asking, “Did you have a good day?” ask, “What was the best part of your day?” or “How did that situation make you feel?”


5. Paraphrase and Reflect Back

To show that you’re fully understanding the speaker, paraphrase what they’ve said in your own words. Reflecting back helps confirm that you’re interpreting their message correctly and encourages further clarification if needed.

  • Tip: After the speaker finishes, summarize what they said by rephrasing key points. For example, “So, what I’m hearing is that you’re feeling frustrated because of the recent changes at work.”
See also  31 DIY Wood Christmas Ornaments:

Example: If a friend is explaining a tough situation, you might say, “It sounds like you’re feeling overwhelmed by all the responsibilities at home. Is that right?”


6. Empathize with the Speaker

Empathy is crucial in active listening. When you empathize, you go beyond understanding the words the speaker is saying and connect with their feelings. This shows that you care and can relate to their emotional experience.

  • Tip: Practice putting yourself in the speaker’s shoes. If they’re expressing frustration, sadness, or joy, reflect those emotions in your response, even if you don’t share the exact same experience.

Example: If someone shares a personal struggle, respond with empathy: “I can’t imagine how tough that must be, but I’m really glad you’re opening up about it.”


7. Avoid Judgment

Active listening requires you to listen without forming judgments or jumping to conclusions. Resist the urge to judge the speaker’s thoughts or emotions, and instead, remain neutral and open to understanding their perspective. Judgment-free listening creates a safe space for honest communication.

  • Tip: Keep an open mind, especially when you disagree. If you have a different opinion, save it for later and focus on understanding the speaker’s viewpoint first.

Example: If someone shares a decision they made that you don’t agree with, instead of criticizing, say, “I can see how that made sense for you at the time. Can you tell me more about how you reached that decision?”


8. Respond Thoughtfully

Once the speaker has finished their message, take a moment to respond thoughtfully. Instead of rushing into your response, pause to consider what they’ve said, how you feel about it, and how best to contribute to the conversation.

  • Tip: Give yourself a moment to reflect before responding. When you do speak, aim to be clear, concise, and relevant to the discussion.
See also  31 DIY Felt Christmas Ornaments

Example: After listening carefully to a colleague’s ideas during a meeting, you might say, “I really like your point about improving the workflow. Have you thought about how we could implement that across other departments?”


Conclusion

Active listening is a skill that can significantly improve your communication and strengthen your relationships, whether at home, at work, or with friends. By giving your full attention, reframing negative thoughts, and showing empathy, you can create more meaningful and productive conversations. These 8 techniques will help you become a better listener, foster mutual understanding, and enhance your ability to connect with others on a deeper level.

Remember, active listening isn’t just about hearing words—it’s about engaging with the speaker and validating their feelings. Start practicing these techniques today, and watch your relationships and communication improve!

Continue Reading

Life Hacks

Reliable Laundry Hacks to Save Loads of Money

Published

on

By

Laundry may seem like a simple weekly task, but over time, it can drain your wallet with the cost of water, energy, detergent, and wear on your clothes. By making a few smart changes to your laundry routine, you can save money without sacrificing clean clothes. Here are some tried-and-true laundry hacks to help you save time, money, and keep your clothes looking fresh.


1. Use Less Detergent

Why It Works:

Many people use more detergent than needed, assuming it’ll make clothes cleaner. In reality, too much detergent can cause buildup, making clothes stiff and less fresh over time. Using less detergent not only saves money but also preserves the fabric quality.

How to Do It:

  • Check the Measurement: Use the correct measurement for the load size; usually, you only need about half the recommended amount.
  • Consider HE Detergent: If you have a high-efficiency (HE) washing machine, using an HE-specific detergent that’s low-sudsing is better for your machine and more cost-effective.

2. Wash in Cold Water

Why It Works:

Heating water for hot or warm cycles is one of the most energy-consuming parts of laundry. Cold water is effective for most washes and can help prevent clothes from shrinking or fading.

How to Do It:

  • Opt for Cold Settings: For regular clothes and colors, choose the cold water setting.
  • Pre-Treat Stains: For tough stains, apply a stain remover or a bit of detergent directly to the stain before washing to make sure they come out clean in a cold cycle.

3. Line-Dry Whenever Possible

Why It Works:

Dryers consume a lot of electricity and can be rough on your clothes, causing shrinkage and fading. Line-drying saves on energy costs and preserves fabric life.

How to Do It:

  • Use a Drying Rack: A drying rack or clothesline can work wonders, especially for delicate items.
  • Hang Outside: When weather permits, hang clothes outside for a fresh, natural scent.
  • Partial Drying: If you’re short on time, consider partially drying clothes in the dryer and then hanging them up. This reduces dryer use and energy costs.
See also  Sponge hacks you need to know

4. DIY Fabric Softener Alternatives

Why It Works:

Fabric softeners can be pricey and leave residue on clothes and your washing machine. Homemade alternatives like vinegar can soften clothes and help remove any lingering detergent residue.

How to Do It:

  • Add White Vinegar: Pour half a cup of white vinegar in the fabric softener compartment of your washing machine. Don’t worry about the smell—vinegar dissipates as the clothes dry.
  • Baking Soda Option: Add a quarter cup of baking soda to the wash cycle for soft, fresh-smelling clothes.

5. Make Your Own Laundry Detergent

Why It Works:

Homemade laundry detergent can save you a significant amount of money over time and reduce exposure to harsh chemicals. Plus, you can customize it to your scent and sensitivity preferences.

How to Do It:

  • Recipe for Homemade Detergent:
    • 1 bar of grated soap (like Castile or Fels-Naptha)
    • 1 cup of washing soda
    • 1 cup of borax
    • Mix the ingredients and store in an airtight container. Use about 1-2 tablespoons per load.

This homemade detergent is effective, affordable, and lasts longer than most store-bought options.


6. Wash Full Loads Only

Why It Works:

Running smaller loads wastes water, detergent, and energy. Washing full loads reduces the number of cycles and helps maximize each wash.

How to Do It:

  • Organize Laundry Days: Set aside specific days for laundry, so you’re washing only full loads.
  • Adjust Settings for Small Loads: If you must wash a smaller load, adjust the water and detergent amounts accordingly.

7. Use Dryer Balls

Why It Works:

Dryer balls reduce drying time by separating clothes, allowing hot air to circulate more freely. They also soften clothes naturally, eliminating the need for dryer sheets.

See also  How to clean baseboards without bending over?

How to Do It:

  • Purchase Wool or Plastic Dryer Balls: Wool dryer balls are eco-friendly and reusable. Simply toss them in the dryer with your clothes.
  • Essential Oil Option: Add a few drops of essential oil to each dryer ball for a natural, fresh scent without extra cost.

8. Treat Stains Immediately

Why It Works:

Addressing stains right away can prevent them from setting and keep clothes looking new. This reduces the need for expensive stain removers and replacement clothing.

How to Do It:

  • DIY Stain Solution: Mix one part dish soap, one part hydrogen peroxide, and one part baking soda. Apply it directly to stains before washing.
  • Keep a Stain Remover Handy: Having a stain remover in your laundry area or even a portable one in your bag can save you time and money in the long run.

9. Skip the Iron—Use a Wrinkle-Release Spray

Why It Works:

Ironing can be time-consuming and increase your electricity bill. Wrinkle-release sprays are effective at quickly smoothing clothes without the need for heat.

How to Do It:

  • Make Your Own Wrinkle-Release Spray: Combine water, a splash of white vinegar, and a few drops of essential oil in a spray bottle. Lightly spray and smooth clothes with your hands.
  • Hang or Lay Clothes Flat: Hang clothes immediately after washing or drying to minimize wrinkles naturally.

10. Embrace Shorter Cycles and Eco Settings

Why It Works:

Most modern washing machines have eco or quick-wash settings that use less water and energy. These settings are typically effective for lightly soiled clothes, which don’t require an intensive wash.

See also  15 College Hacks for Freshmen That Will Make Life So Much Easier

How to Do It:

  • Use the Quick Wash for Regular Loads: For lightly soiled clothes, opt for the shorter, energy-efficient cycle.
  • Eco Mode: Use eco-friendly settings that reduce water and energy usage, especially if your machine has them.

11. Turn Clothes Inside Out

Why It Works:

Turning clothes inside out helps preserve their color and reduce wear on the fabric. This simple trick can keep clothes looking new longer, saving you money on replacements.

How to Do It:

  • Especially for Dark Colors and Jeans: Turning dark clothes inside out before washing can help prevent fading.
  • Prevent Pilling: This also helps reduce pilling on delicate items like sweaters and knits.

12. Air-Dry Delicates and Heavy Fabrics

Why It Works:

Delicate and heavy fabrics, such as wool and denim, can be damaged in the dryer. Air-drying these items extends their lifespan, saving you money on replacements.

How to Do It:

  • Dry Heavy Items Separately: Lay flat to dry or hang up heavier items like jeans and sweaters.
  • Avoid Hangers for Stretchy Fabrics: Lay stretchy fabrics flat to dry, as hanging can cause them to lose their shape.

Conclusion: Save Money and Prolong Your Wardrobe with Smart Laundry Hacks

By incorporating these simple and effective laundry hacks, you can save on energy bills, reduce detergent usage, and keep your clothes in great condition for longer. Not only will these tips save you money, but they’ll also make your laundry routine more eco-friendly. So give them a try—you’ll notice the difference in both your wallet and your wardrobe!

Continue Reading

Recent Posts

Categories

Trending

© Copyrights 2025 - All Rights Reserved